

I broke my Nano Controller // PCOMP W1
Sep 8, 2024
Some trouble along the way
When I started my practice for physical computing (PCOMP), I made a fun mistake. I spent too much time going through the components and not enough time reading about the nano controller. In my eagerness, I used my AC/DC power converter and ran it through my Arduino controller. Big mistake! The controller's lights by the USB port briefly lit up, then turned off as it started to heat up. I think I broke it!?`
Back to the Basics
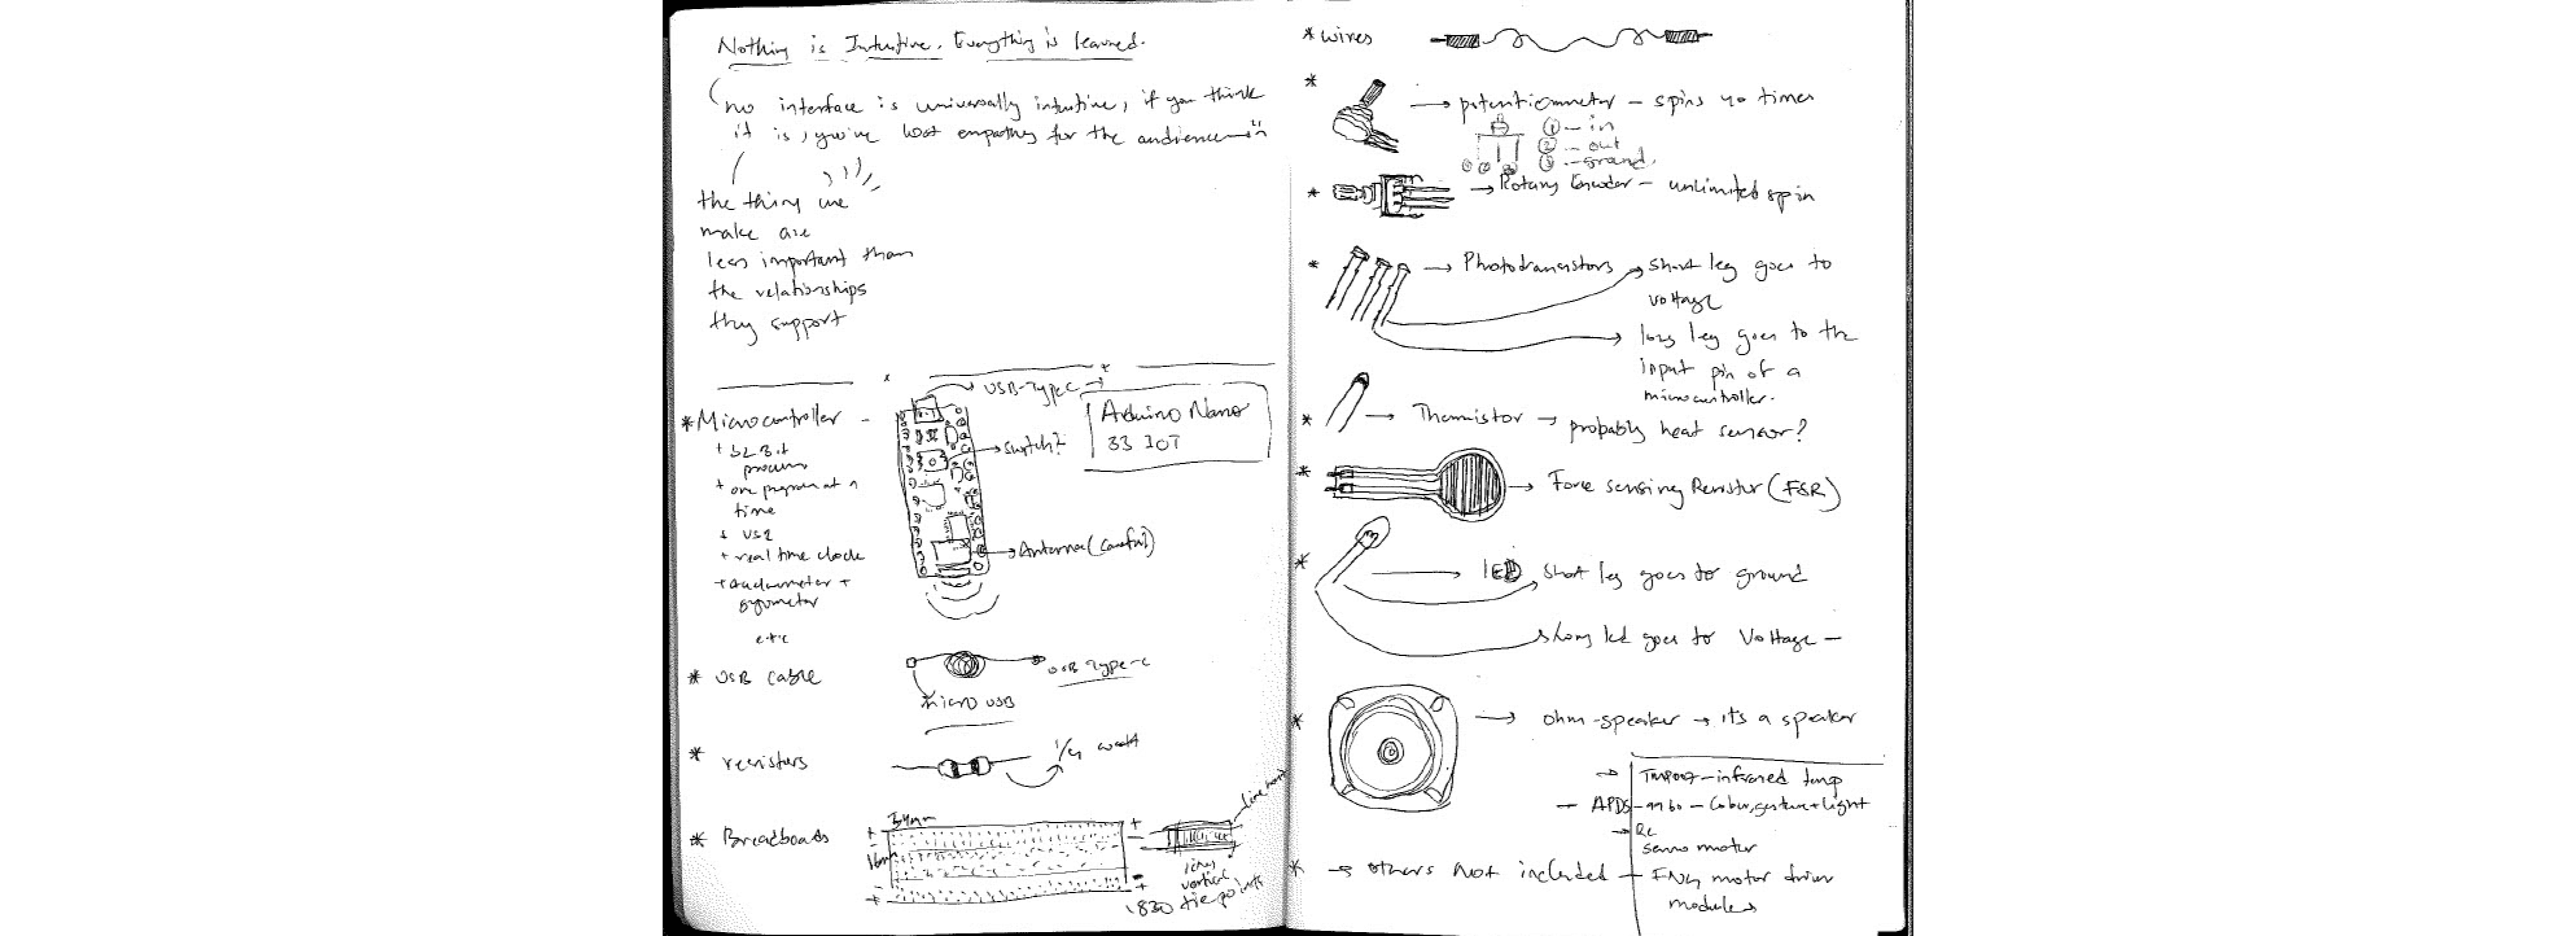
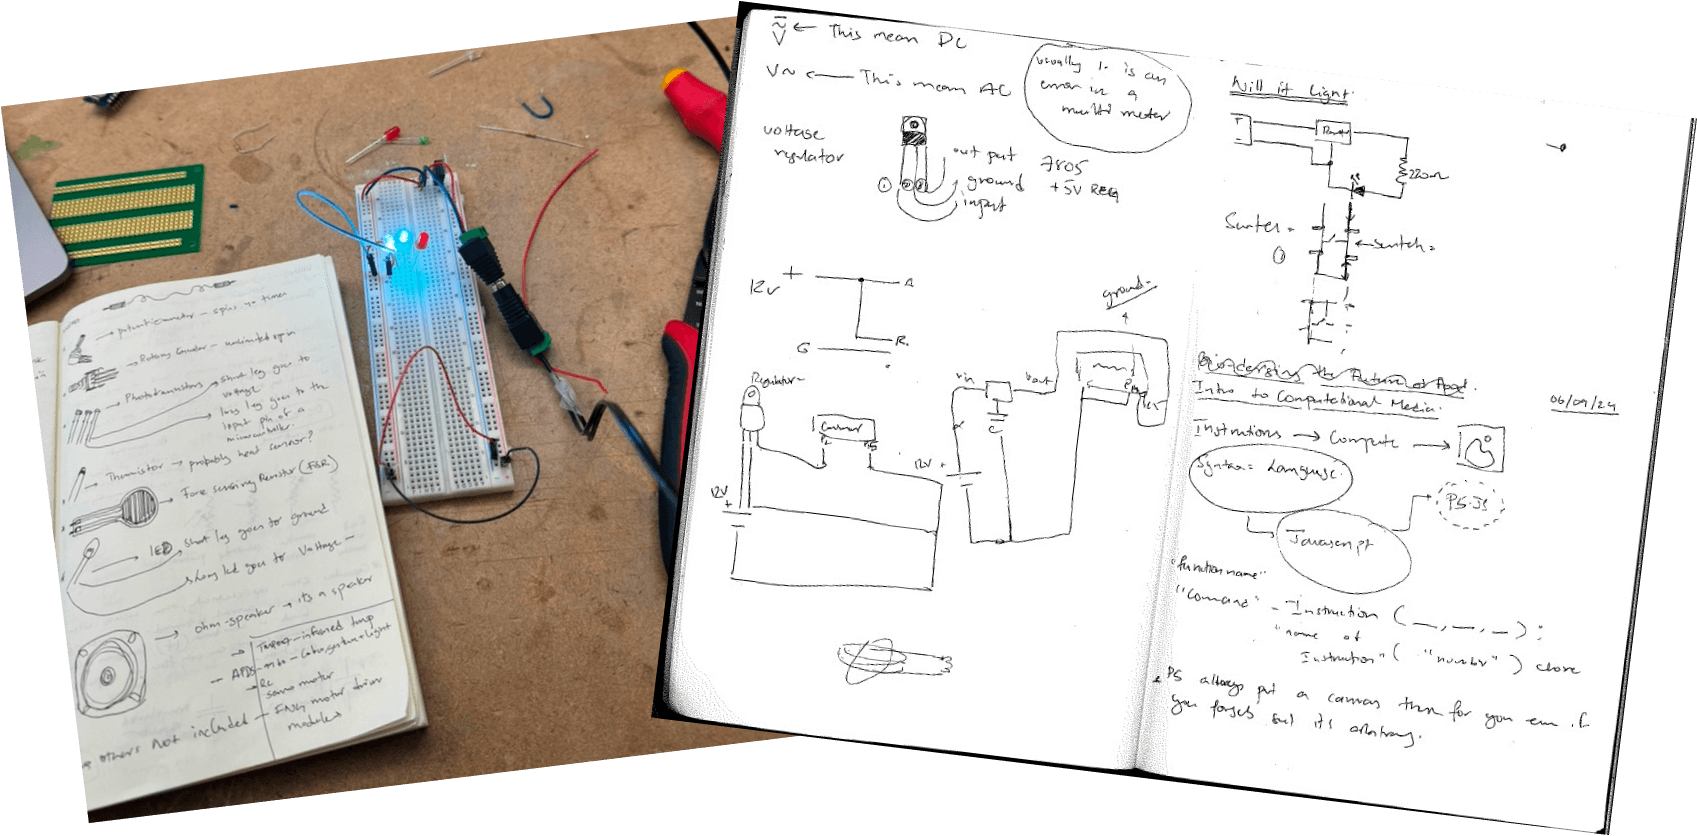
After my initial setback, I went into the notes and spent a lot of time thoroughly reviewing the material and even drew out components with their circuit diagram equivalents. This helped ground me for the work ahead.
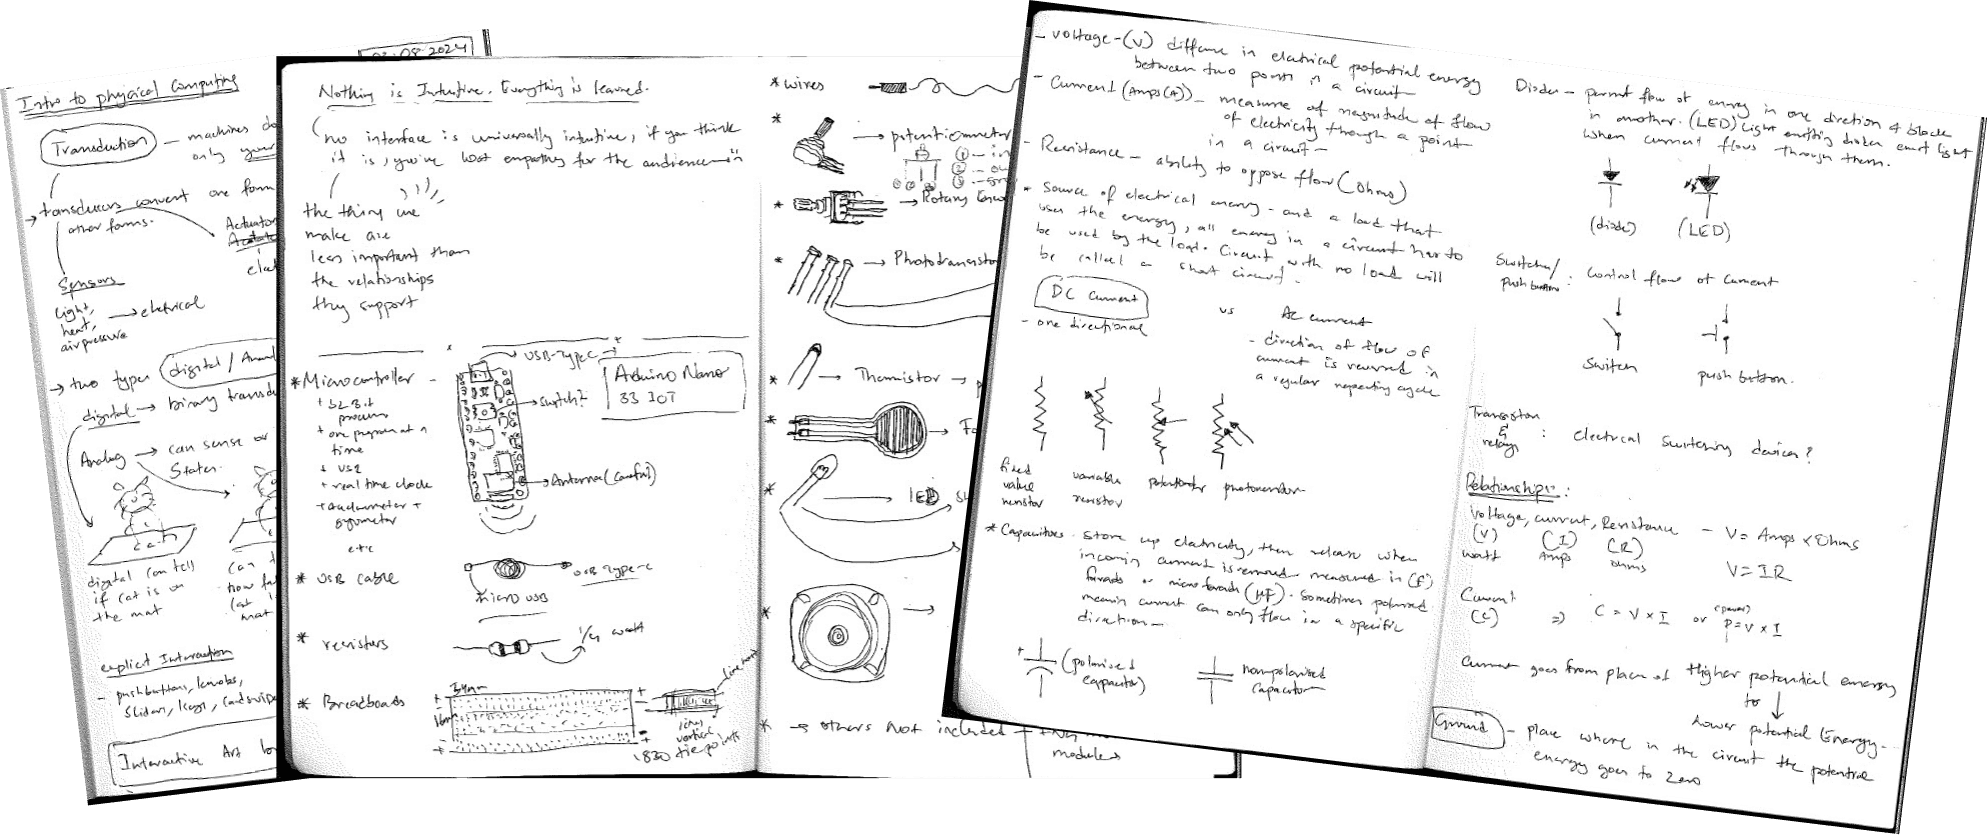
Lab 1: Components
This part was pretty straightforward, especially since I had already drawn the components earlier. Here are some pictures:
Lab 2: Setting up the Breadboard
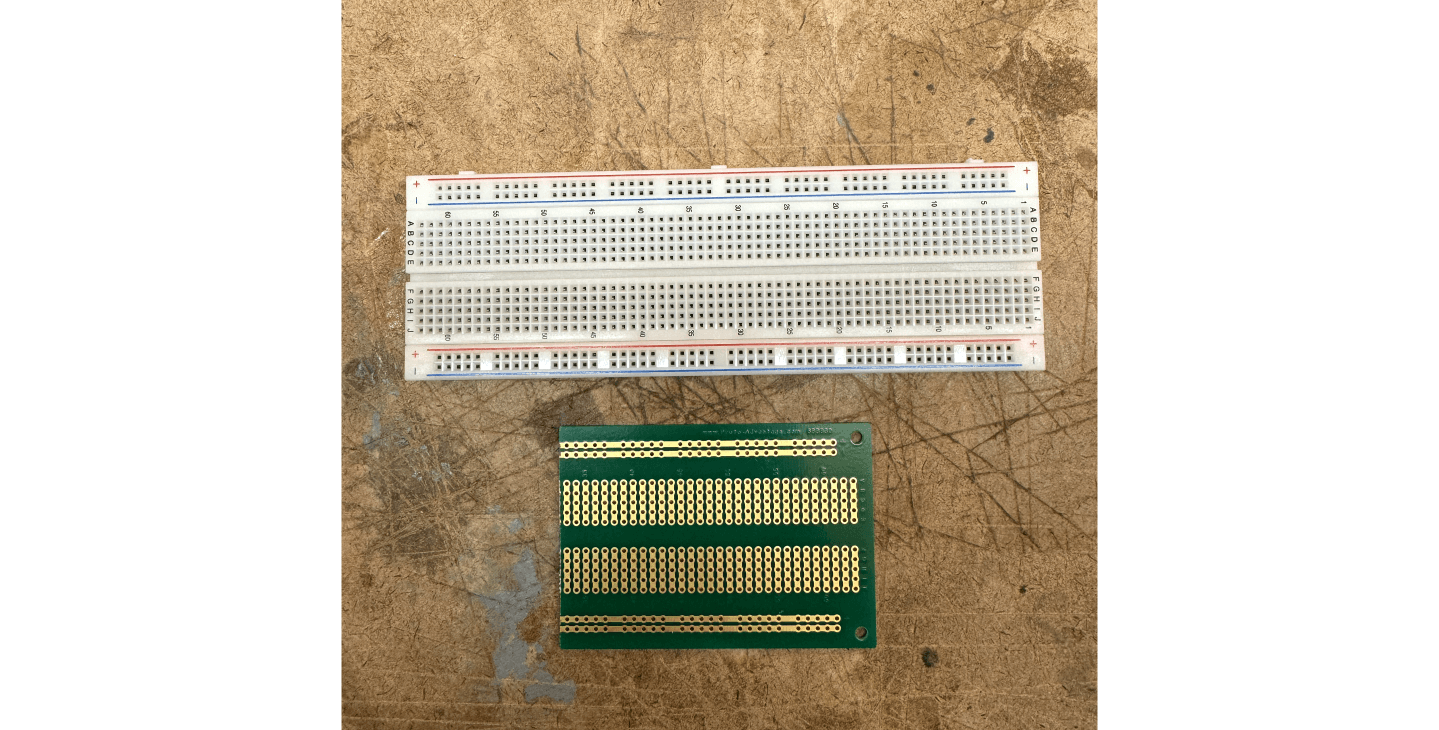
Setting up the breadboard was also quite straightforward. I found a naked breadboard in the junk pile, which was super helpful in understanding how the connections work internally - both along the center and on the sides.
However, I made a mistake here. I added a 125V DC power supply to my Arduino, which only takes up to 7-21 volts. I guess I shorted it? For the rest of the exercises, I used a 12V DC power supply I found in the waste bins.
Lab 3: Electronics and Using a Multimeter
Most of this was fairly straightforward too. I noticed something interesting though - when I used different LEDs in parallel, power only went through one. I figured this must be because electricity follows the path of least resistance, and some LEDs have less resistance than others.
Lab 4: Switches and Pushbuttons
I really enjoyed this one! I played around with different switches and experimented with the conductive properties of various materials. I tried water, a pencil, a fruit, my hands, and tin foil.
I also experimented on the bread board using parallel and series circuits to spell out the letter S with LED’s
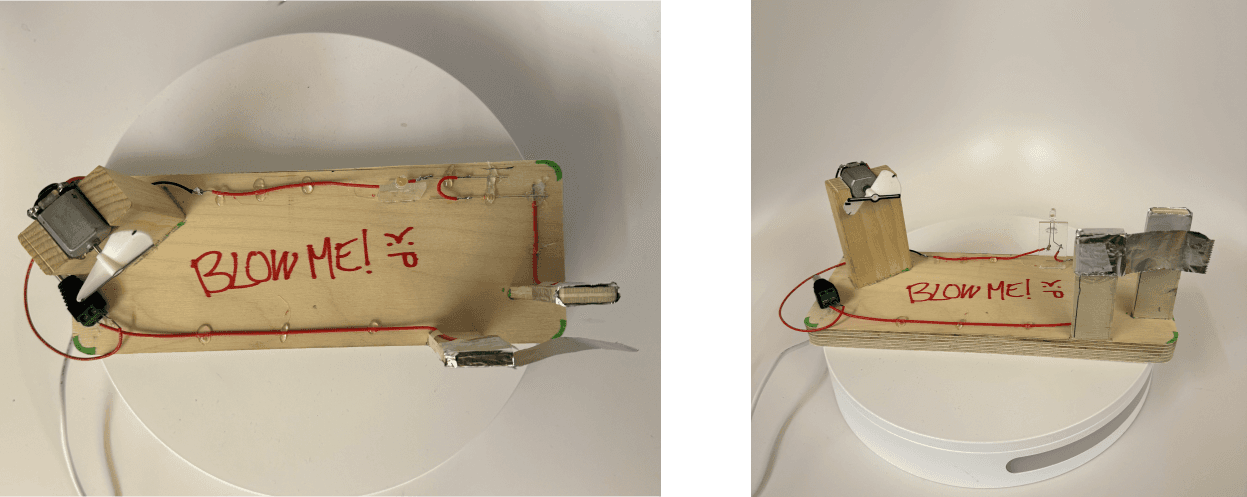
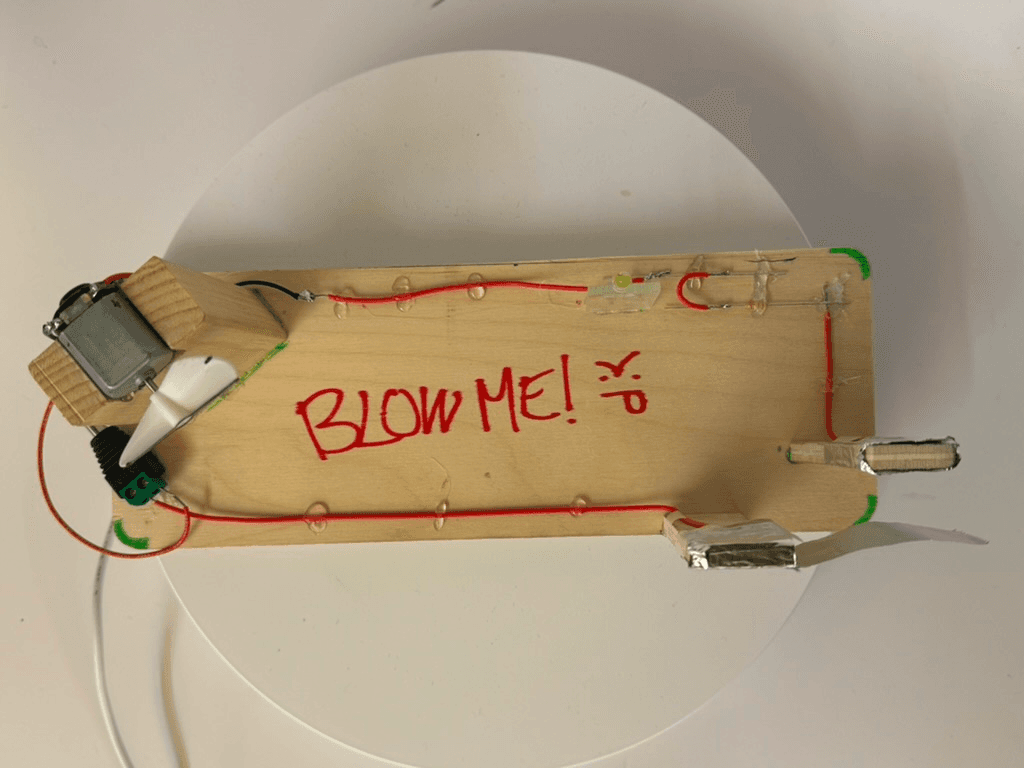
The Assignment: "Blow Me!" - An Absurd Device
For my assignment, I wanted to build something absurd after playing with the motor. So, I designed "Blow Me!" - a device that lets you blow air on yourself to cool down. Here's how it works:
1. I used regular kitchen aluminum foil as a switch due to its conductive properties and thinness (it moves when you blow on it).
2. I added a light for visual feedback when you blow.
3. The switch gives you both visual feedback and works on your sense of touch/feel.
Challenges and Solutions
1. Power issues: The 12V DC supply was too much for LEDs to handle (I blew out my first one). It also made the motor shake violently.
- Solution: I added two 3.3 Ohm resistors. Using V = IR, I calculated how to reduce the current by applying enough resistance.
2. Airflow direction: I needed the fan to blow air away from the motor instead of behind it.
- Solution: I discovered that reversing the motor's wiring made it rotate in the opposite direction. I marked the + and - on my motor and reversed the circuit.
3. Propeller problems: Paper and cardboard propellers weren't durable and kept falling off.
- Solution: I 3D printed a propeller using Rhino to design it. I measured the motor cog width, scaled the design, printed it, and attached it.
The Final Product
I drew a diagram to visualize my idea, took some measurements, and started cutting and making the switch. I soldered all the parts together, closed the circuits, and it worked!
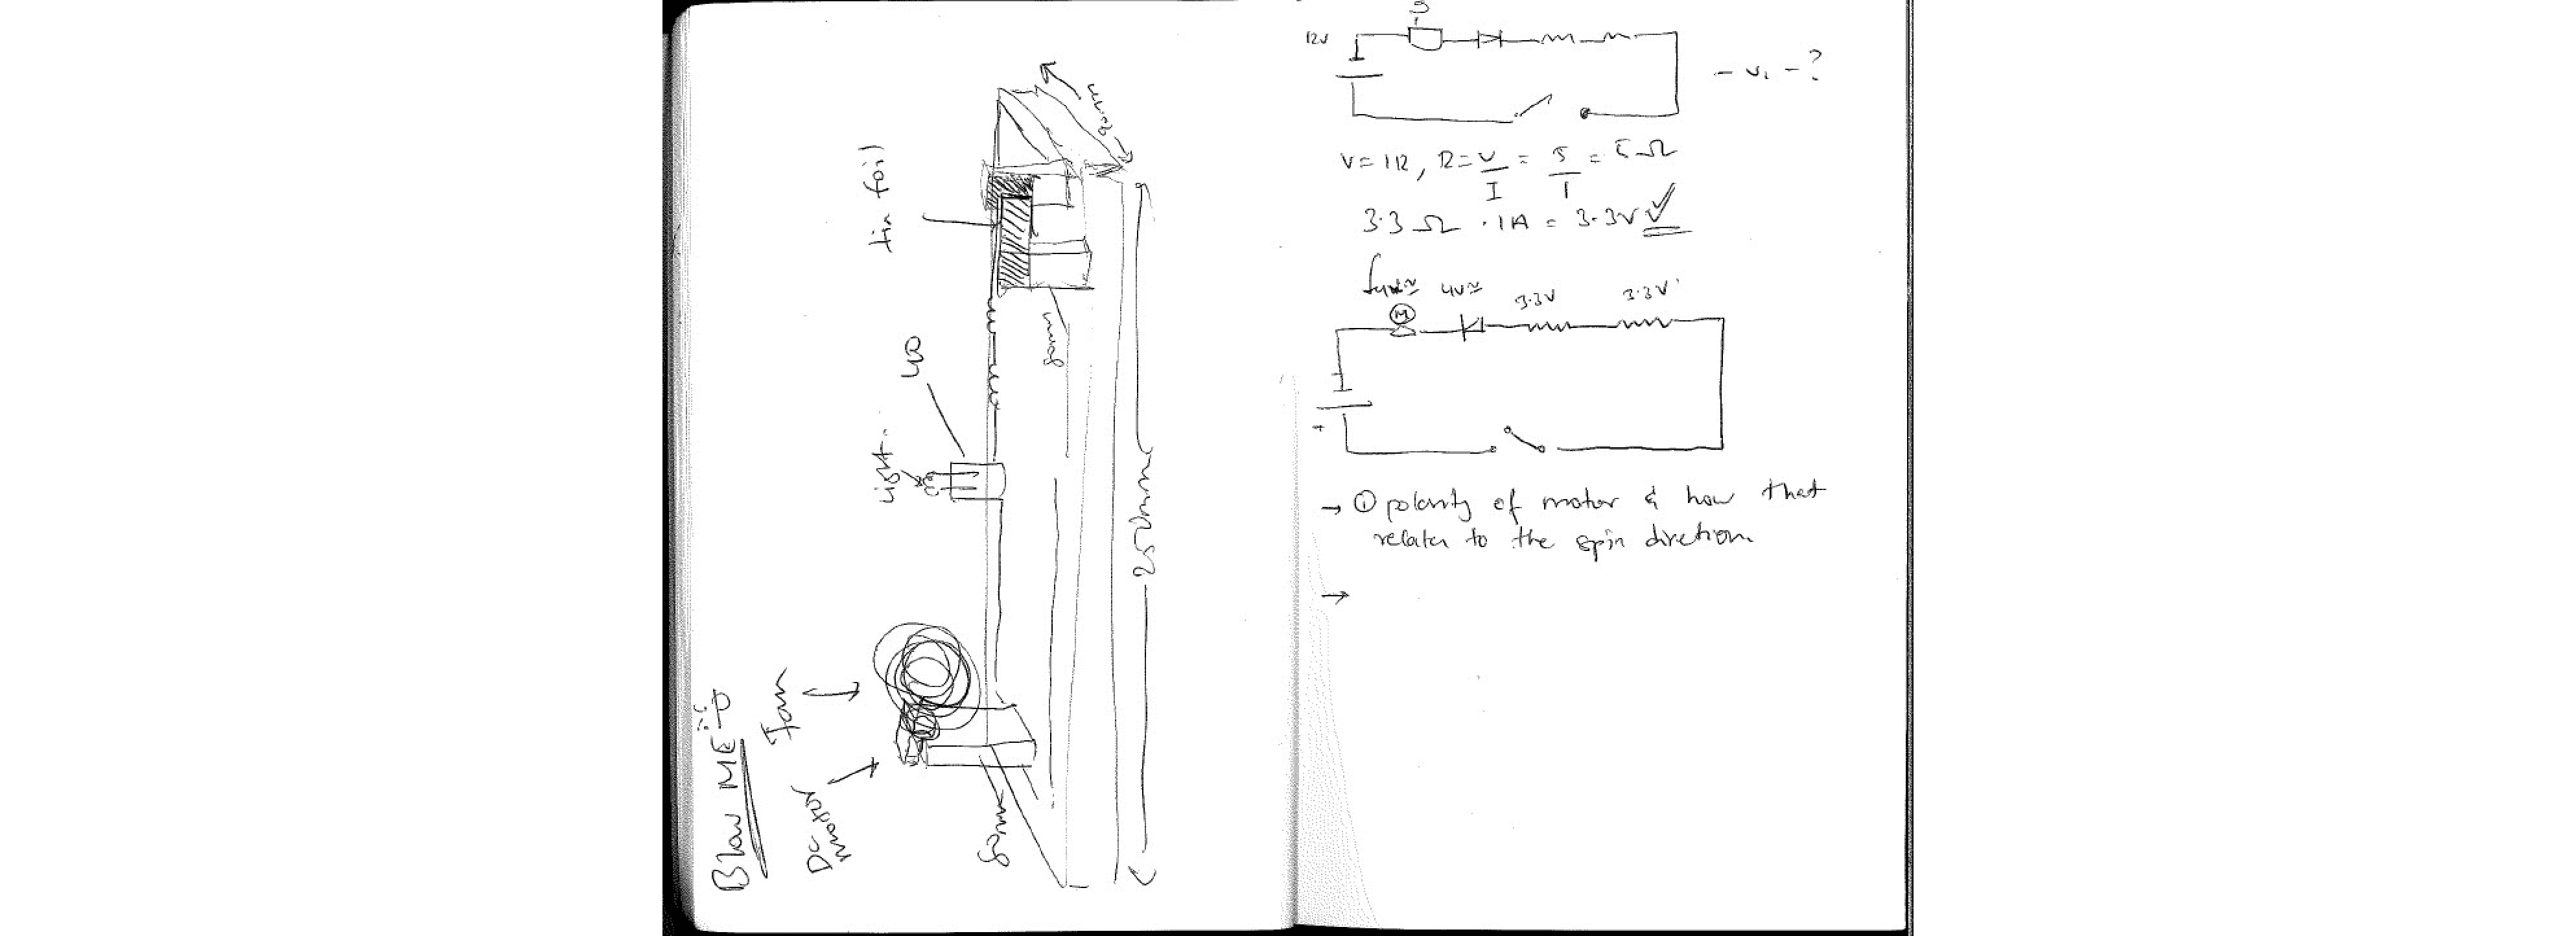
Interestingly, my switch is also kind of a transducer - it's essentially a wind sensor! When someone blows on it, it detects the wind and closes the circuit to blow back at them.